
Workspace Connect – connect AI & API
With Workspace Connect an AI or a program works directly with your workspace: read and – by your rules – write. An AI always works with exactly one workspace.
Before you connect
Before an app connects, you need two things:
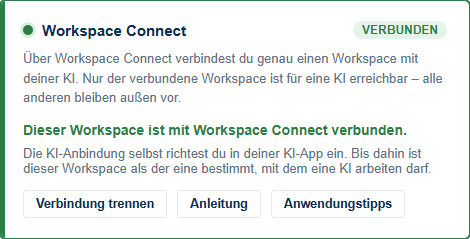
Enable the workspace. Open the start page and, in the “Workspace Connect” card, enable the workspace to work with. Exactly one workspace is active at a time.
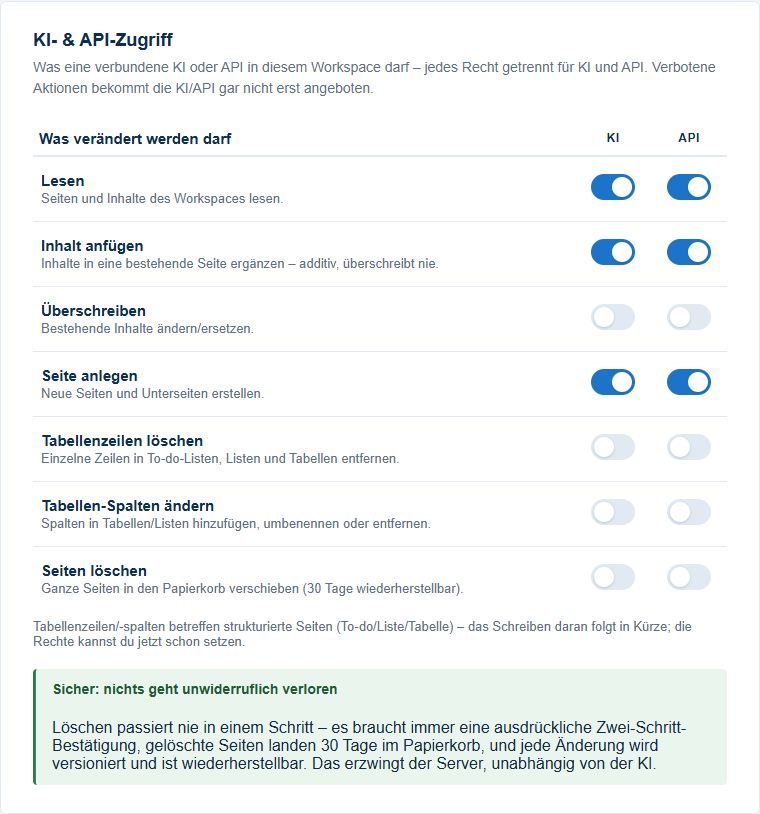
Set the rules. In Workspace settings → “AI & API access” you decide per right (read, append, overwrite, create, delete) separately for AI and API what is allowed. Anything forbidden is never even offered.
Connect your app
Expand your app:
ChatGPT
ChatGPT connects snori via developer mode. It currently works even with a free account; officially OpenAI lists the Plus, Pro, Business and Enterprise plans – if developer mode is missing, you need one of those.
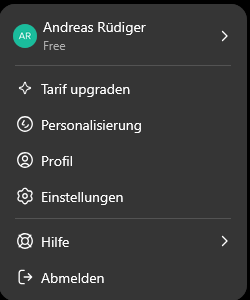
Click your name at the bottom left and open “Settings”.
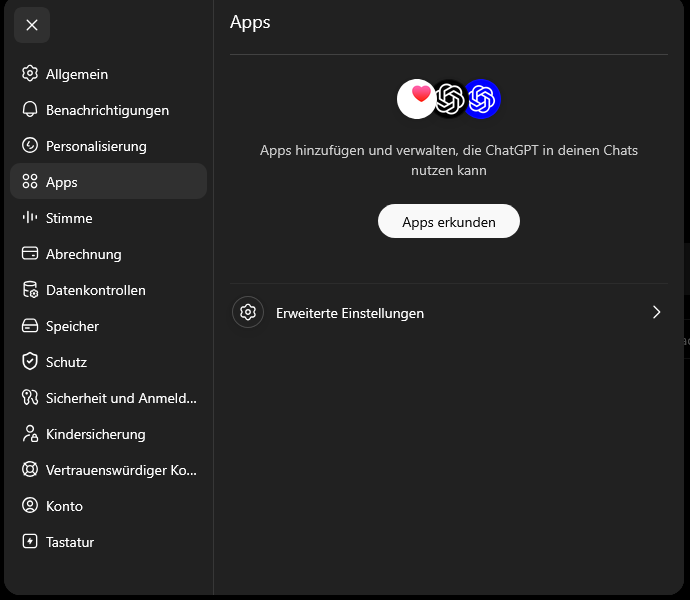
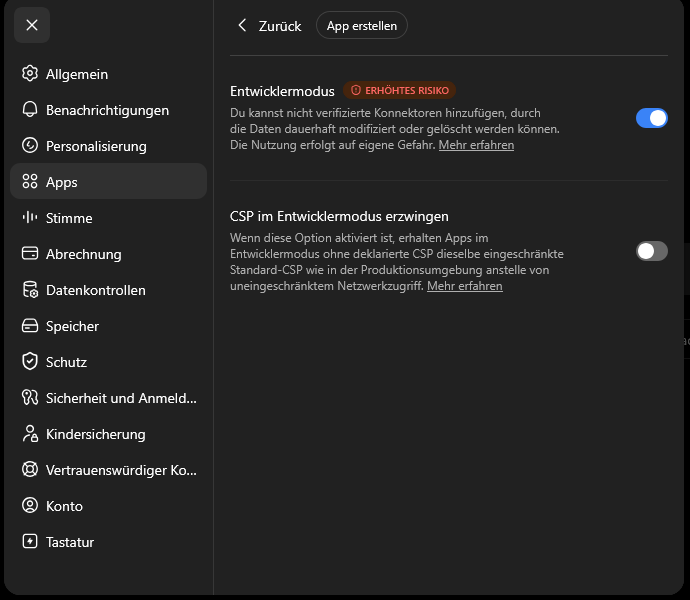
Switch to “Apps” on the left and open “Advanced settings” at the bottom.
Turn on developer mode. “Create app” then appears at the top – click it.
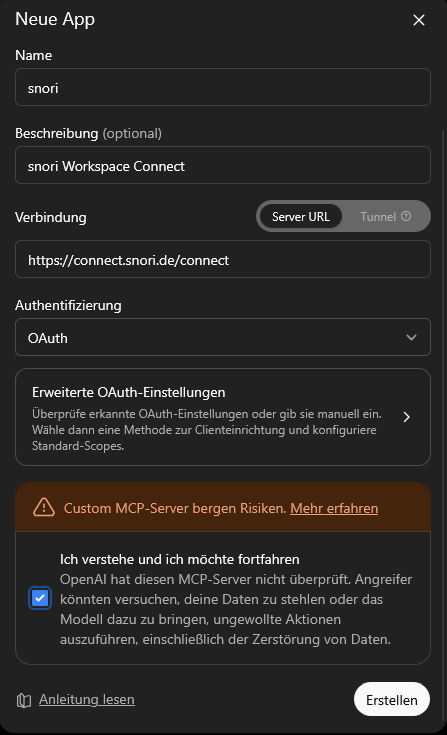
Fill in the form: Name “snori”, Connection = Server URL https://connect.snori.de/connect, Authentication “OAuth”. Tick “I understand …” and click “Create”.
You are redirected to snori: log in (email, password, two-factor code), choose the access on the approval screen and click “Connect”.
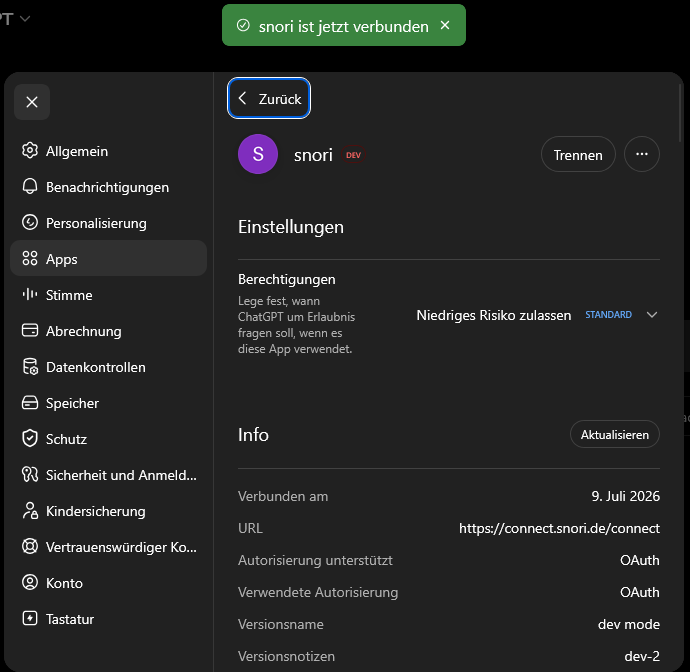
Done – “snori is now connected” appears at the top. Try it in chat: “Show me the status of my snori connection.”
Note: custom connectors don’t work in ChatGPT “Projects” – use a normal chat.
Claude
Claude is quick – no developer mode. Custom connectors are available on free Claude (one connection) and on Pro, Max, Team and Enterprise.
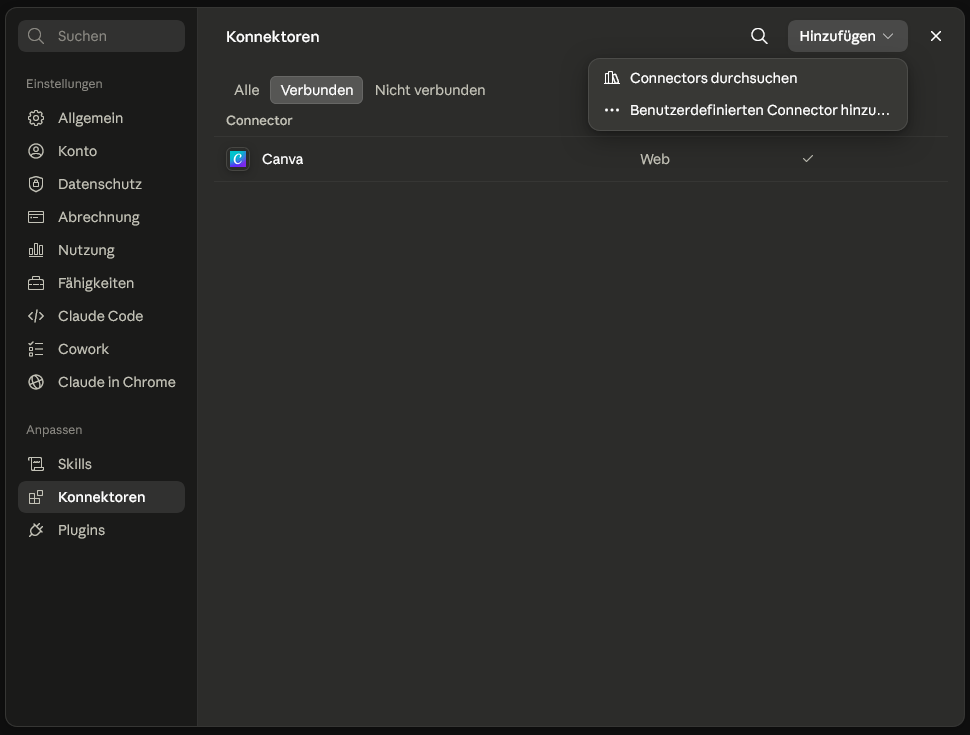
In Claude go to Settings → “Connectors” and click “Add” at the top right.
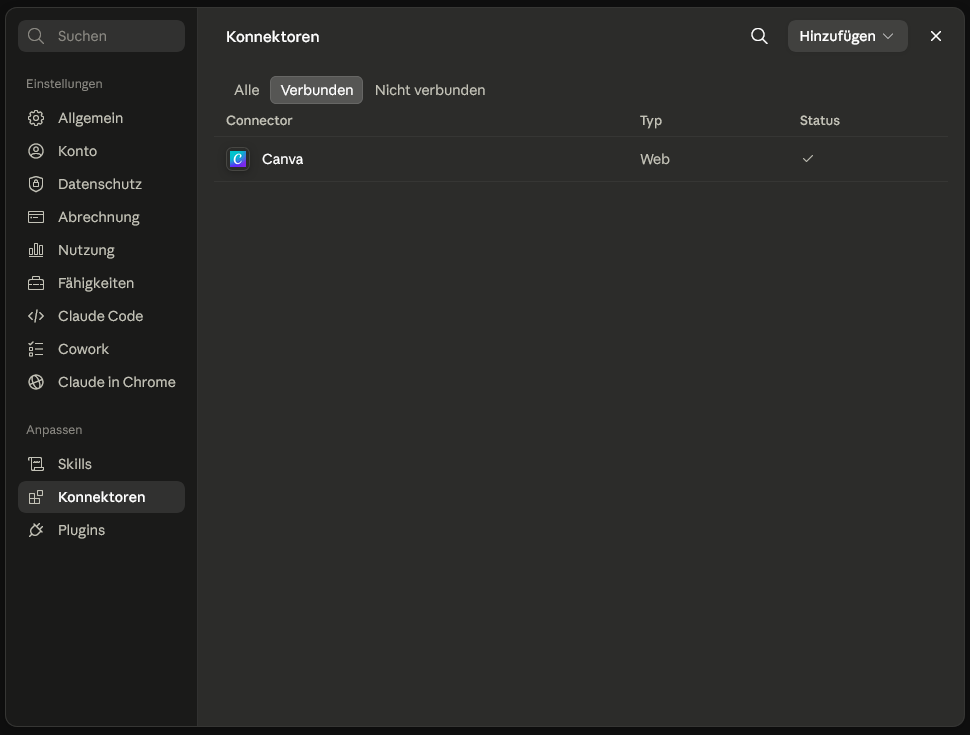
Choose “Add custom connector”.
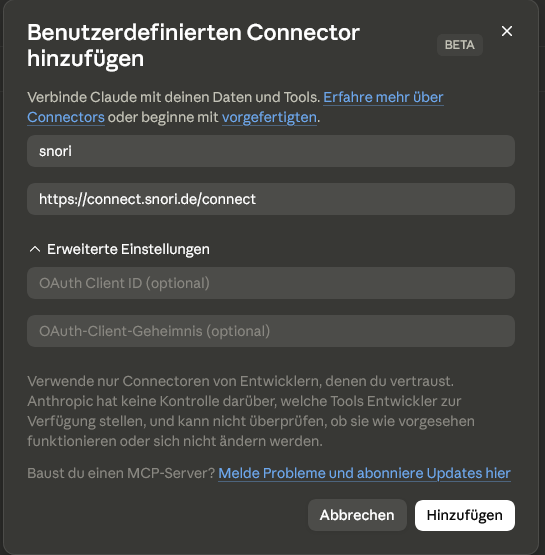
Enter Name “snori” and the address https://connect.snori.de/connect (leave the OAuth fields empty) and click “Add”.
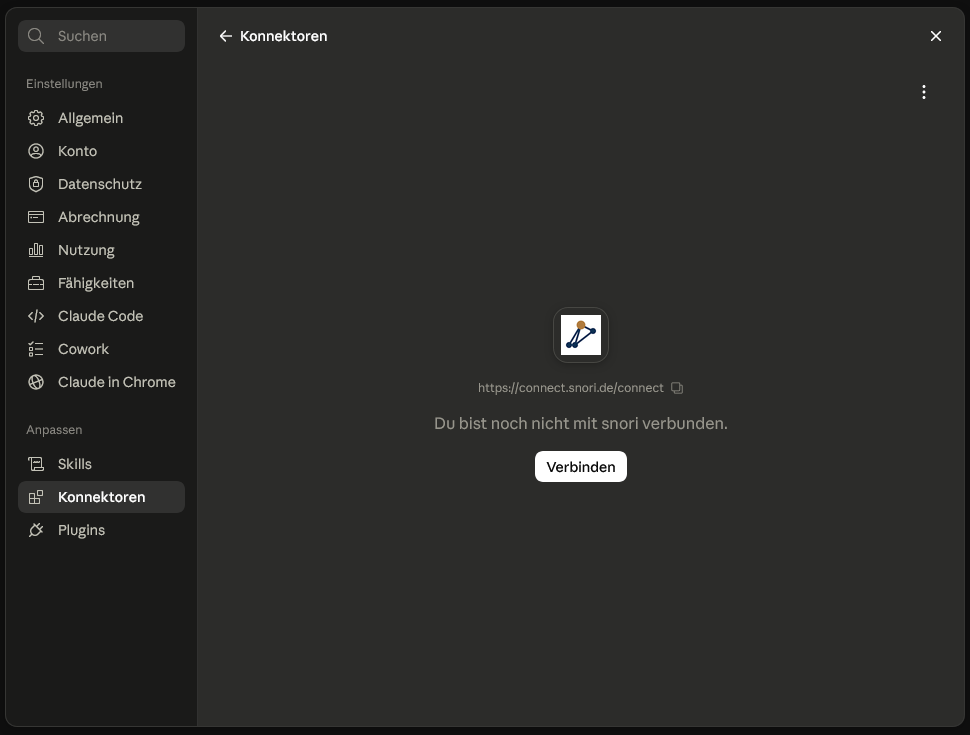
On the new entry click “Connect”, log in to snori and confirm the approval. Done.
Perplexity
Custom connectors on Perplexity require a paid plan: Pro, Max or Enterprise.
Open Settings → “Connectors” and choose “Add custom connector”.
Name “snori”, Server URL https://connect.snori.de/connect, Authentication “OAuth”, Transport “Streamable HTTP”.
Log in to snori, approve – done.
Mistral Le Chat
Custom MCP connectors on Le Chat require a paid plan (the pre-built connectors are free).
Click “+ Add Connector” and choose the “Custom MCP Connector” tab.
Enter Name “snori” (no spaces/special characters) and Server URL https://connect.snori.de/connect. Le Chat detects OAuth automatically – log in and approve.
Google Gemini
The regular Gemini app (web/mobile) does not support custom MCP connectors. Use the Gemini CLI (a free developer tool) or Gemini Enterprise (Google Cloud).
Gemini CLI: in ~/.gemini/settings.json under mcpServers add snori with the address https://connect.snori.de/connect (field “httpUrl”).
Gemini Enterprise: in the Google Cloud console create a “Custom MCP Server” data store with this address and OAuth.
Microsoft Copilot Studio
For Copilot Studio (Power Platform, business) – not the regular consumer Copilot.
In the agent go to Tools → “Add a tool” → “New tool” → “Model Context Protocol”.
Provide Name, URL https://connect.snori.de/connect and Authentication “OAuth 2.0”. Copilot Studio creates a connector behind the scenes.
Developer tools (Cursor, VS Code, Cline …)
Editor and agent tools usually add MCP via a small config file – often free or included in your existing plan. Example (Cursor ~/.cursor/mcp.json, others similar):
{
  "mcpServers": {
    "snori": { "url": "https://connect.snori.de/connect" }
  }
}
VS Code (GitHub Copilot, agent mode), Cline, Windsurf, Zed and Claude Desktop follow the same pattern – enter the address, then log in to snori via OAuth on first use.
Your own program / API
For automations (e.g. Zapier) or your own programs you use an API key instead of an AI login.
In Workspace settings → “API keys” give it a label and click “Create key”.
Copy the key once (afterwards it is stored only as a hash).
Send requests with the key in the header:
curl -H "Authorization: Bearer snk_YOUR_KEY" \
  https://connect.snori.de/api/v1/pages
What the key may do comes from the API column of the rights matrix above — nothing to set twice. Full endpoint list: see the API guide.
If something is stuck
- New features missing / AI acts “old”: refresh the connection in the app or start a new chat – some apps cache the tool list per session. An app quirk, not a snori bug.
- “No active workspace”: do preparation step 1.
- Change rejected: the AI is told the reason – usually a rule that doesn’t allow it right now. Adjust the rule or rephrase.
Known quirks (developer mode)
- snori is not (yet) an officially registered connector – in ChatGPT you enable it via developer mode. Official registration is planned.
- Custom connectors don’t work in ChatGPT “Projects” – use a normal chat (enable per chat if needed).
- Rule changes take effect immediately – flip a right in the workspace settings and it applies on the AI’s next call, no reconnecting.
- Only if the connection itself is stuck or looks “outdated”: refresh the connector or start a new chat (a quirk of the AI app, not snori).
Missing something or unclear? Write to helpdesk@snori.de.